On Friday, I was lucky to find an Ott Lamp on clearance in Joann's, so obviously I grabbed it. I also bought two clip on lamps from Walmart, they were under $10 each and a pair of daylight bulbs from GE also $10 for the pair. Being that I have items of different sizes and won't be just photographing jewelry I had be sure that my box would be tall enough to accomodate all I want to photograph, but I couldn't find one large enough for my needs. My alternative was to buy the slightly pricier foam boards that are used for school projects. I bought a trifold board and a single sheet board.
After getting everything home, I attempted to put the box together but suddenly realized I wouldn't have any space to store this contraption in my already crowded townhouse. So I decided to keep it all separate and not make it permanent so it could be moved around and stored when not in use.
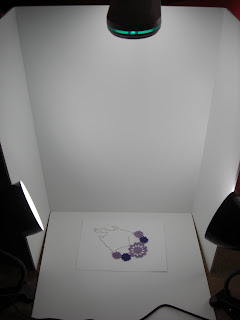
Here is my setup, the Ott lamp in on an armchair providing light from above, the other two lamps I set on the floor.

I know it's not as pretty or neat looking like the ones I referenced, but it's functional, does it's job and can be put away. I find I still need to touch up the pictures so there is still some tweeking to be done to get it perfect.
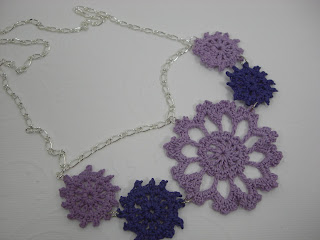
Here is one of the pics I took using my new set up without any photo editing.

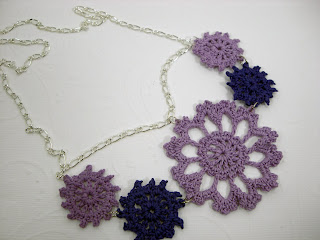
Here is the same image after using the Autofix feature in Picnik

Here are some of the great links I used to guide me in my decision making, check them out and come up with your own lightbox, and show me your own setup.
Homemade Light box for product photography
How to make an inexpensive light tent
Create an inexpensive photography lightbox
Also don't forget to try this great free program to retouch your photos

Great article gleeza!
ReplyDeleteHi Gleeza,
ReplyDeleteI found your site via Etsy so I came over to see about your world and wouldn't you know this is the exact thing I am trying to do for photos for my etsy site. What a great idea and tutorial! Thank you for the links.
Enjoy your day!
Barb
Great idea!
ReplyDeleteWonderful! Thank you
ReplyDeleteThanks for your idea. I have 3 etsy shops and have had a time of taking good photos w/digital. I have always been good w/35mm, but still learning about digital. I take my pics usually in a sunny window, turn off flash, and play with the macro
ReplyDeletehttp://www.etsy.com/listing/46077394/amethyst-heart-necklace-free-shipping
and http://www.etsy.com/listing/50970460/seashell-and-copper-seahorse-pendant
It has been a learning experience. I have finally gotten a tripod, which I hope helps.
What a great idea. Thank you. My light box takes up LOTS of valuable storage space in my office/studio.
ReplyDeleteThanks for the ideas! I've been meaning to find a better set up for photographing my cards ;)
ReplyDeletethe photos are everything...
ReplyDeleteI really struggle with my photos too - thanks for the links! I will check them out.
ReplyDeletewow, this is a great find, I made my light box..it works great. I luv the chair you covered in the orange fabric, so pretty....I found you through Etsy...have a super week, check out my blog if you have time!
ReplyDeleteenjoy *~*